And since he needed a quilt for his bed, I searched all over the web for a robot quilt or bedspread to buy or a pattern of a quilt I wanted to make. But didn't find either that quite matched what I was picturing.
So, then I decided to design my own.
And...I gave the unfinished quilt to my son a year and a half ago.
For his birthday.
And then....I had a hard time finishing it.
I meant to get back to it quickly after his big day. But I didn't think about the next three birthdays in the family within the next month. And then the summer got busy. And then...and then....a year and a half passed.
Yes. I'm aware. I'm a stinky mom.
Every now and then he'd say things like, "You need to finish my quilt, mom." But mostly he was very sweet and not pushy at all. So, then, of course, I felt worse.
I made a decision last month. I couldn't craft or make anything else for Christmas presents unless I finished that quilt.
And I did it!
Granted, I didn't make any other presents, but I got this quilt done*.
So, how do you give a gift again that you've already given? Well, my Sam is always searching for underwear. I don't know what happens to his. I mean, where does it go? So, I bought him a bunch, put the quilt in the bottom of a big box, covered it with layers of tissue paper and then laid out the selection of underwear, some covered with robots.
 |
But then he found the tissue paper underneath and tore it away. One robot peeked out. "YOU FINISHED IT?!"
And then he became a blur of joy.
 |
Applique Robot Quilt Tutorial
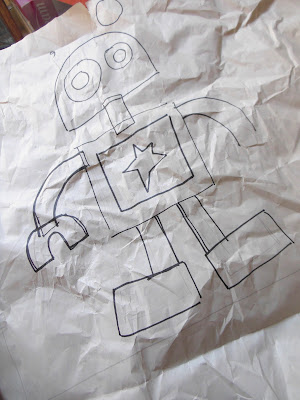
Step #1: I decided I wanted to do really big quilt blocks. And then I took big sheets of paper, drew the size of blocks I was making and drew big robots. I looked at loads of robots on-line and then some I just made up. I had fun with this part...
 |
| In case you're wondering, wrinkling the paper is not part of the process. This one was kicking around in my sewing room for...um...the past long while. |
Step #2: Time to start appliquing those robots. I traced the fabric-bots onto fusible webbing and got busy fusing the different pieces to fabric. You can see a cute video my friend did about doing appliques on her blog, The Life of a Cheap Chickadee.
Step #3: {Optional} Wait months and months before you get the blocks out again.
Step#4: Machine applique your robots.
Step #5: Sew blocks together, add borders, layer with middle and backing (I used a green minky) and quilt. Ta-duh! Your robots are ready to conquer a bed near you!
 |
| These two are my favorites. |
*Disclaimer: And I when I say it's done...I mean, um...it's mostly done. For example, as I was laying it out I noticed a few of the robots have antennas missing the wires connecting them to the top of their heads. So....I'll be hand sewing some wires real soon. Hopefully they won't take me a year and a half.
Linked up to...(Alright, I figured out how to make these smaller...but now I can't figure out how to get them all together! Anyone know?)


